Tool change and touch off
 |
| -Click to Go Back |
When you install a new tool, please follow the steps below.
- Press Emergency-Stop before changing the tools.
- Type G43 HX (G43 H1 for the tool 1) on the MDI screen or use the SELECT TOOL button to select the tool you want to replace.
- Disengage Emergency-Stop: rotate to the right until it clicks back into its original position.
- After changing tool, perform the touch off procedure.
Tool Touch Off
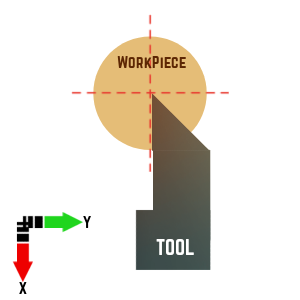
Use tool 1 to face the z surface of the workpiece first. The workpiece should be flushed with guide bushing before you start to touch off. Select tool 1 on the screen. Move the tip of the tool via pendant to the center of the workpiece.

Enter zero on the TOX and zero on the TOY to start from a good position.
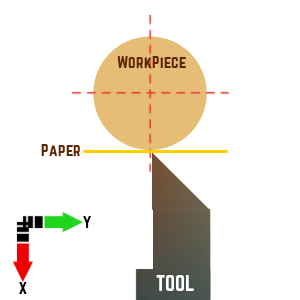
Then enter G0X0.6Y0 in the MDI window and hit enter to move the tool below the workpiece. Move the workpiece towards the front of the machine (z-axis) via pendant. Place a paper (0.003” thick) between the workpiece and the tool.

Use the pendant for micro moves until you can not move the paper between the tool and the workpiece. Slowly move the tool from the workpiece, and the paper in micro moves. Stop where you can pull the paper out from the tool. To define the work coordinates (G54 work offsets), enter your own value (0.506” for ½” stock) and click on the tool touch-off (TOX) button.
Repeat this process for the Y-axis. Use your own value (0.253” for ½” stock), then TOY.
Z touch off: Use your own value (-0.003” for the paper thickness) then TOZ. It is not as critical as other axes.
Move to the next tool: Repeat the same processes for the X, Y, and Z axes.
